You just got some gauges at a swap-meet but you don’t know if they work? What do you do next? Test them!
The fuel gauge in most pre-digital cars work by pointing a needle within a sweep range on a gauge based on variable resistance through variable resister in the fuel tank. This resistance measured in ohms (Ω) varies for each car and manufacturer. The basic principle applies, as the resistance decreases, the gauge moves to EMPTY and as resistance increases the gauge moves toward FULL. To test, you will need a variable resister (potentiometer), testing wire (with alligator clips preferred), a 12V source and a volt meter that can measure ohms (resistance).
The following instructions are specifically for a 1970-1981 Firebird and Trans Am fuel gauge. The same steps may be followed for your gauges, just keep in mind that the ohm range between FULL and EMPTY may be different. You will also need to identify which leads in your gauge are positive (power source), negative ground and lead to fuel tank sender unit.
Tools Needed
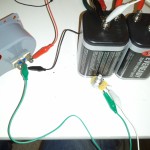
- 12 Volt power source – I used two 6 Volt lantern batteries (Amazon: Lantern Battery, 6 Volt 2 needed), they are light, portable and are generally safer to use for this type of testing. You will need to link them together in series in order to get 12 volts. You do this by connecting the + positive terminal of one battery to the – negative ground of the other.
- Various test lead alligator clips – To make testing connections (Amazon: SE Clip Test Lead Set (10 Piece)
)
- Variable resister (potentiometer) – To test different ohm resistances (Amazon: 100 Ohm Potentiometer
) A 500 ohm potentiometer may be necessary depending on the ohm range of your gauge. The Fuel gauge in our Trans Am reads full at 90 ohm, so a 100 ohm potentiometer is ideal for this gauge.
- Volt Meter -that can test resistance – To test ohm resistance in potentiometer (Amazon: Digital Multimeter
)
Test for Empty Tank (No Resistance, 0 Ohms)
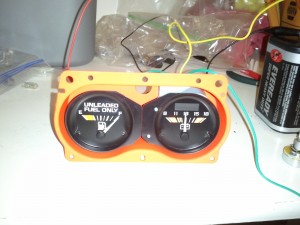
To test for zero resistance, connect the ground lead of the gauge to the negative ground terminal on the battery with a black test lead wire and the positive lead to the positive terminal on the battery with a red test lead wire . By grounding the lead that connects to the fuel tank sender, we are telling the gauge that there is no resistance to the tank which should make the needle move to EMPTY.
Test for Full Tank (90 Ohms)
 To test for a full tank, we now need to introduce the potentiometer into the equation. The potentiometer will have three leads, the center is the ground and the left or right lead should connect to the gauge lead that would go to the fuel tank sender. Note, the other lead on the potentiometer should not be used. It does not matter which lead you use on the potentiometer, picking one side over the other just changes the direction you should turn the dial to increase/decrease resistance.
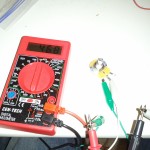
 Before wiring in the potentiometer, we need to set it to about 90 ohms of resistance. To do this, turn on your volt meter in ohm reading mode and connect the center ground terminal to the ground wire on your volt meter, and the selected side terminal to the positive lead of your volt meter. Slowly turn the potentiometer until you read 90 on your volt meter. Now your resistance is setup so your gauge will read FULL.
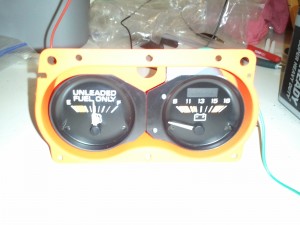
Now connect the center ground lead terminal of the potentiometer to the negative terminal on your battery, and the previously used side terminal to the fuel tank sender lead on your gauge. Your ground and positive connections made when you tested for Zero Resistance should be in place as well. Once all connected, your gauge should now read FULL.
We also connected the positive terminal of the volt meter to the positive terminal of the battery to test the volt meter at the same time. You can see both the fuel gauge and volt meter are working.
Test for 1/2 Tank (45 Ohms)
To test for 1/2 tank of fuel, repeat the last steps, except set the potentiometer to about 45 ohms of resistance.
As you can see the gauge is very close to 1/2 full. This is good enough for a $5 swap-meet find! This time we did not test the volt meter.
A similar approach may be used to test the water temperature and oil pressure gauges. We will cover these in future posts.
Test for failed connection (Infinity Ohms)
I don’t believe Infinity Ohms is a thing though the volt meter will read as such, the easiest way to explain this scenario is assuming there is endless Ohms of resistant. Another way of saying it, there is NO current or connectivity between the gauge and the sending unit in the gas tank. In this scenario, the fuel gauge will read beyond full.

