I’m now 2 years into my 1981 Pontiac Trans Am project and things are just now starting to come together! This post is a good outline of everything that has been happening since February, 2012.
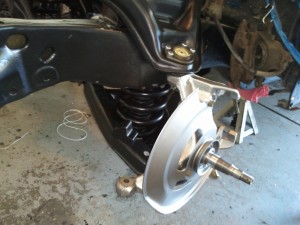
Front Suspension Together Again
The front suspension is back together! I have to thank my my friend Joel for helping me get the springs installed. It’s interesting, we spent a good 2 hours installing the drivers side spring, then a week later we installed the passenger side spring in 10 minutes. Basically don’t compress the spring too much and use a crowbar, things go a lot faster. Yes we did use a spring compressor as well as chains to keep the spring from causing damage had it sprung loose.
Only thing remaining is the brakes and the car will be rolling again! Not in the photo are the rotors, which are now installed. Read my last post about the problems I had with Raybestos Rotors from Amazon.
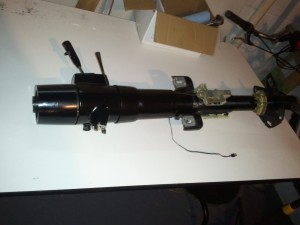
Steering Column Rebuilt
The steering column was an excellent winter project. I started working on it in January actually, but didn’t really dig into it further than the steering wheel till March. I spent a a few random hours in the basement taking it apart and putting it back to together. I was really pleased by how tight and smooth it steers now, there’s no more play at the tilt mechanism, and the left turn signal now works!
Aside from replacing the turn signal mechanism switch and ignition key cylinder, I also repainted the entire column with Krylon Fusion satin black and topped it with Krylon Fusion UV clear. It really looks good.
Door Hinge Rebuilt
Okay, Actually there are two hinges, I’ve only rebuilt the upper door hinge, lower is still in progress, but what a difference it’s made! once I got the upper door hinge back on the car, I was able to investigate why the window was not lining up with the gaps. I found a broken window track and I’m now in the process of repairing that. The window should be back together by the end of this week.
I cleaned and painted the lower hinge over the weekend. Once I’m satisfied that the paint is nice and cured, I will install new bushings and then re-bolt on the rebuilt hinge to the door.
Window Track Repair
The window tracks for these cars are interesting to say the least. I would have thought ball bearings on tracks would have been used, but it’s actually a more crude version of the kind of tracks found on cheap dresser drawers. Granted the tracks themselves are heavier metal, the wheels that roll in the tracks are cheap plastic intended to pivot and spin freely within the tracks.
When I got the door apart to fix the hinges, I found the reason why the door glass was not lining up with the car. The rear track plastic roller was missing, allowing the window to roll up beyond the height it was intended. This also causes the window to bow forward and up at the rear, causing fitment issues both at the rear of the door and at the front. This one broken part will turn the car from looking like it is completely miss-aligned to looking like it came from the factory! I ordered a new window roller and waited about a week for it to arrive.
To fix, I had to remove the window from the door. It’s an easy task, but once removed, removing the actual “window track roller” from the window was not so easy. At first I thought I could use my own tools to remove the nut, but after doing some research I found that there is “yet another special tool” needed in order to get them off. I ordered the tool, and a couple days later it arrived. Within 2 minutes with the correct tool I had the broken window roller off and the new window roller installed.
I will clean the tracks then reinstall the glass once I finish rebuilding the lower hinge.
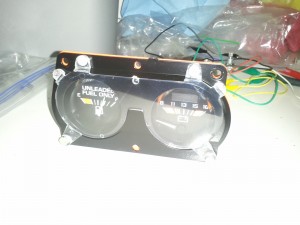
Gauges Restored with Red Lighting
I’ve restored and tested the car gauges over the winter months as well. You can actually test these old gauges by using potentiometers (variable resisters). The only gauge I couldn’t test fully is the tachometer. They cleaned up nicely. I also repainted the gauge backs that reflect the light onto the gauges with a florescent red paint, which now makes the gauges glow red rather than white. It’s a popular mod some Trans Am folks do to customize their birds.
Spring Carlisle!
At the last minute I had an opportunity to go to the Spring Carlisle with a fellow car buddy. It was a lot of fun. I’ll blog about this trip later this month.
What’s Next
Much of the next 2 months will be re-assembly. First of course is the brakes (I got new calipers for the front, new pads, rotors, and stainless steel brake lines all around) and the steering linkage, followed by reinstalling the steering column, intermediate shaft, heater box and other firewall items. Then the motor will be next, including a new exhaust system. Hopefully by June, we’ll have the engine broken in and start reassembling the front body.


